


Hello,
Flutter Image Filter
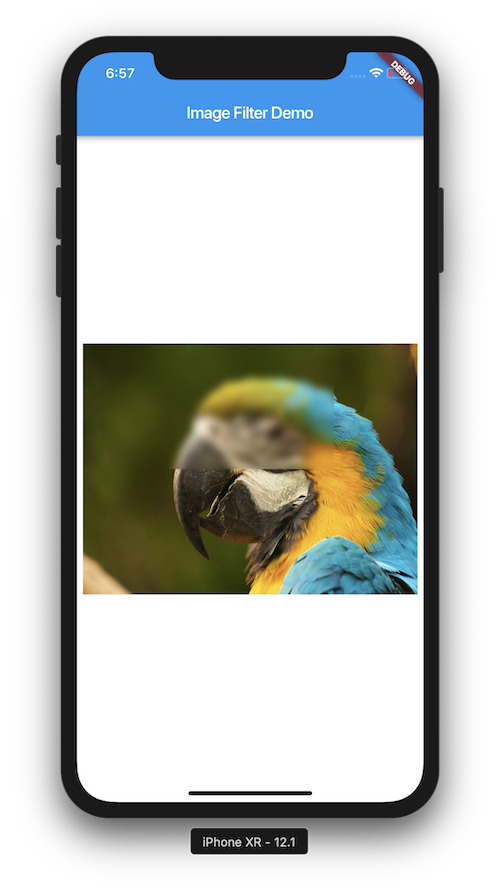
Flutter makes it easy to apply filters to images. This article shows one of the ways to do that. The BackdropFilter widget along with ImageFilter class helps us to achieve this effect.
Watch Video Tutorial
Let’s Start…
Complete Code
I will be showing the complete source code here and explain after that.
Below is the complete code.
import 'package:flutter/material.dart';
import 'dart:ui';

class BackDropFilterDemo extends StatefulWidget {
  BackDropFilterDemo() : super();

  final String title = "Image Filter Demo";

  @override
  BackDropFilterDemoState createState() => BackDropFilterDemoState();
}

class BackDropFilterDemoState extends State<BackDropFilterDemo> {
  @override
  Widget build(BuildContext context) {
    return Scaffold(
      appBar: AppBar(
        title: Text(widget.title),
      ),
      body: Container(
        color: Colors.white,
        child: Center(
          child: Stack(
            children: <Widget>[
              Image.asset(
                "images/parrot.jpg",
                width: 400,
                height: 300,
                fit: BoxFit.fill,
              ),
              Positioned(
                top: 10,
                bottom: 150,
                left: 30,
                right: 100,
                child: BackdropFilter(
                  filter: ImageFilter.blur(sigmaX: 5, sigmaY: 5),
                  child: Container(
                    color: Colors.black.withOpacity(0),
                  ),
                ),
              )
            ],
          ),
        ),
      ),
    );
  }
}
This is the simple code to achieve a simple blur effect in a part of the image.
The Backdropfilter helps you to achieve the blur effect along with ImageFilter. The main thing to remember is that, the blur will be applied not to the child of BackDropFilter, but to the widget, beneath it. Here it is the ‘Parrot’ image. The Positioned.fill widget is used to fill the blur in the entire image. You can blur certain portions of the image with the help of Positioned(top:xx, bottom:xx, left: xx, right:xx). You can have your own effect with the help of ImageFilter.matrix() function. For example, rotate or skew the image.
This can also be applied even if the image is downloaded from the internet.
That’s it. Flutter makes it easy for you.
Happy Coding.
Leave your valuable comments below.
Thanks for reading.