


We can use Webviews in Flutter with the help of webview plugins. I will be showing one of the plugins that is developed by the Flutter team. So Let’s start and we will add the dependency first
Webview Flutter
Watch Video Tutorial
Add dependency
The plugin can be found in the below url
https://pub.dartlang.org/packages/webview_flutter
You have to open the pubspec.yaml file that is present in the root of your Flutter project and add the below dependency.
dependencies:
  flutter:
    sdk: Flutter
    ....
    webview_flutter: ^0.3.4
Add Webview
We have to create a Completer
final Completer<WebViewController> _controller =
      Completer<WebViewController>();
We will add the webview to the body of the UI.
body: Builder(
builder: (BuildContext context) {
return WebView(
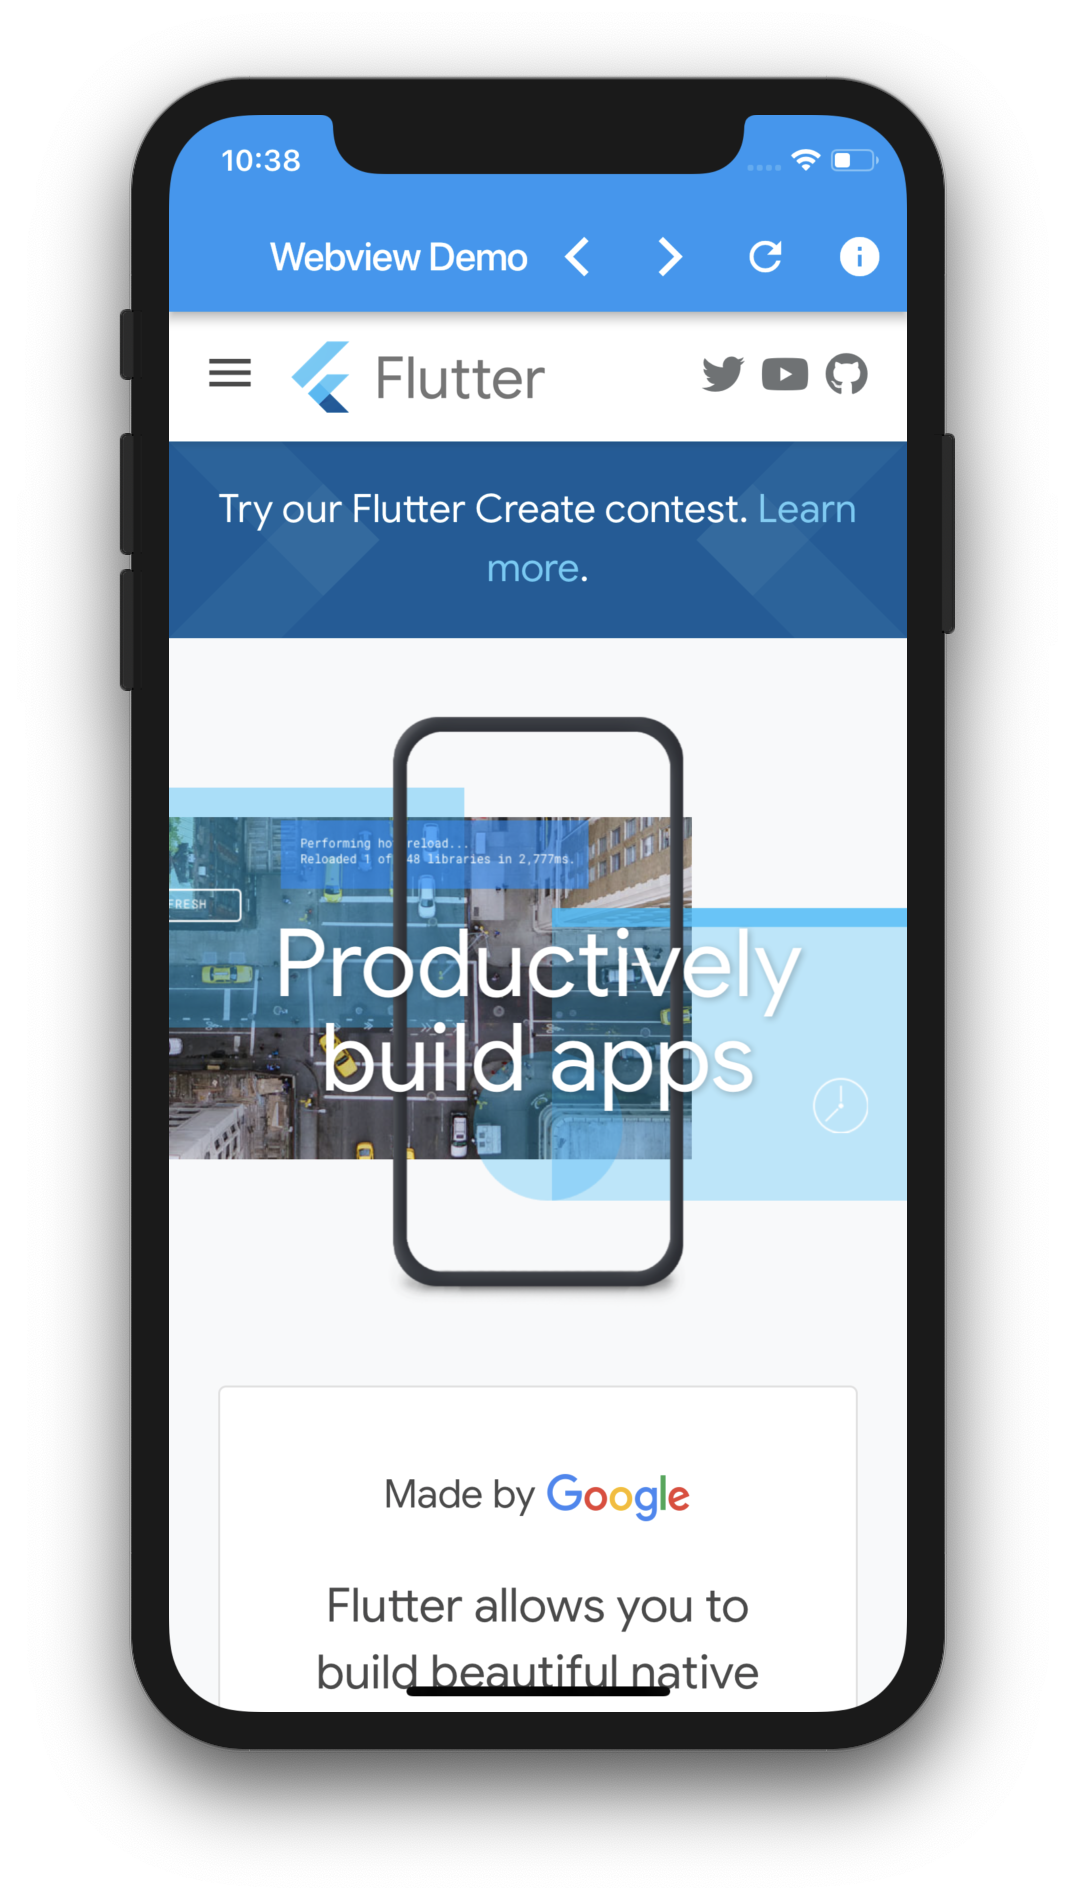
initialUrl: 'https://flutter.dev',
javascriptMode: JavascriptMode.unrestricted,
onWebViewCreated: (WebViewController webViewController) {
_controller.complete(webViewController);
},
);
},
...
onWebViewCreated will be called when the Webview is created and we will call complete on the controller to complete the future.
Add navigation controls
We will add a back button, forward button and a reload button in the AppBar. For that we will create a seperate class called NavigationControls. The back button will send back the webview to its immediate history page and forward button will send it to its forward page. The refresh button will reload the page.
class NavigationControls extends StatelessWidget {

  const NavigationControls(this._webViewControllerFuture);

  final Future<WebViewController> _webViewControllerFuture;

  @override
  Widget build(BuildContext context) {
    return FutureBuilder<WebViewController>(
      future: _webViewControllerFuture,
      builder:
          (BuildContext context, AsyncSnapshot<WebViewController> snapshot) {
        final bool webViewReady =
            snapshot.connectionState == ConnectionState.done;
        final WebViewController controller = snapshot.data;
        return Row(
          children: <Widget>[
            IconButton(
              icon: const Icon(Icons.arrow_back_ios),
              onPressed: !webViewReady
                  ? null
                  : () async {
                      if (await controller.canGoBack()) {
                        controller.goBack();
                      } else {
                        Scaffold.of(context).showSnackBar(
                          const SnackBar(content: Text("No back history item")),
                        );
                        return;
                      }
                    },
            ),
            IconButton(
              icon: const Icon(Icons.arrow_forward_ios),
              onPressed: !webViewReady
                  ? null
                  : () async {
                      if (await controller.canGoForward()) {
                        controller.goForward();
                      } else {
                        Scaffold.of(context).showSnackBar(
                          const SnackBar(
                              content: Text("No forward history item")),
                        );
                        return;
                      }
                    },
            ),
            IconButton(
              icon: const Icon(Icons.replay),
              onPressed: !webViewReady
                  ? null
                  : () {
                      controller.reload();
                    },
            ),
          ],
        );
      },
    );
}
Add Javscript Channels
We will create a new functio that accepts the javascript callback first. This will show a SnackBar message when it receives a javscript call.
JavascriptChannel snackbarJavascriptChannel(BuildContext context) {
  return JavascriptChannel(
    name: 'Toaster',
    onMessageReceived: (JavascriptMessage message) {
      Scaffold.of(context).showSnackBar(
        SnackBar(content: Text(message.message)),
      );
    },
  );
}
onWebViewCreated: (WebViewController webViewController) {
    _controller.complete(webViewController);
  },
  javascriptChannels: <JavascriptChannel>[
    snackbarJavascriptChannel(context),
  ].toSet(),
  ...
Add one more button to the NavigationControls.
 IconButton(
    icon: const Icon(Icons.info),
    onPressed: !webViewReady
        ? null
        : () {
            _onShowUserAgent(controller, context);
          },
  )
Evaluate Javscript
We can get the user agent with the below function.
 void _onShowUserAgent(
      WebViewController controller, BuildContext context) async {
    controller.evaluateJavascript(
        'Toaster.postMessage("User Agent: " + navigator.userAgent);');
  }
So there is the basic stuff about Webviews in Flutter. See you in the next tutorial.
Source Code
Get the source code from here.
Thanks for reading.
Watch the video tutorial to see it in action.
Pingback: Webview in Flutter – Part 2 – MOBILE PROGRAMMING